
As any blogger worth their weight in words knows, you have to create an awesome, shareable image to go with your equally awesome blog post in order for it to attract and tempt people to read said blog post.
The problem arises when you aren't a photographer and don't have funds to purchase stock images — how can you add an image to your blog post when you don't have the resources to do so?
Ah-ha, but you do have resources! There are plenty of options out there to create awesome social images and my personal favourite is Canva.
The main reason that I love Canva is it has templates already set up for the correct sizing for the major social media sites, like Pinterest, Facebook, Twitter etc.
[Tweet “how can you add an image to your blog post when you don't have the resources to do so?”]
It makes creating these images so much easier and you can create several for the same blog post to be shared across these different platforms.
And my favourite part of all is that this tool is free to use!
If you want to access their amazing portfolio of images and photos, you can do so for $1 for each one, which makes this a fantastic option for the newbie or bootstrapping blogger extraordinaire!
Table of Contents
How to Create Awesome Social Images
Step 1 – Choose a template
If you're starting off with a blog post, I generally use the blog post template or the generic social media template, as these fit best with my WordPress theme.
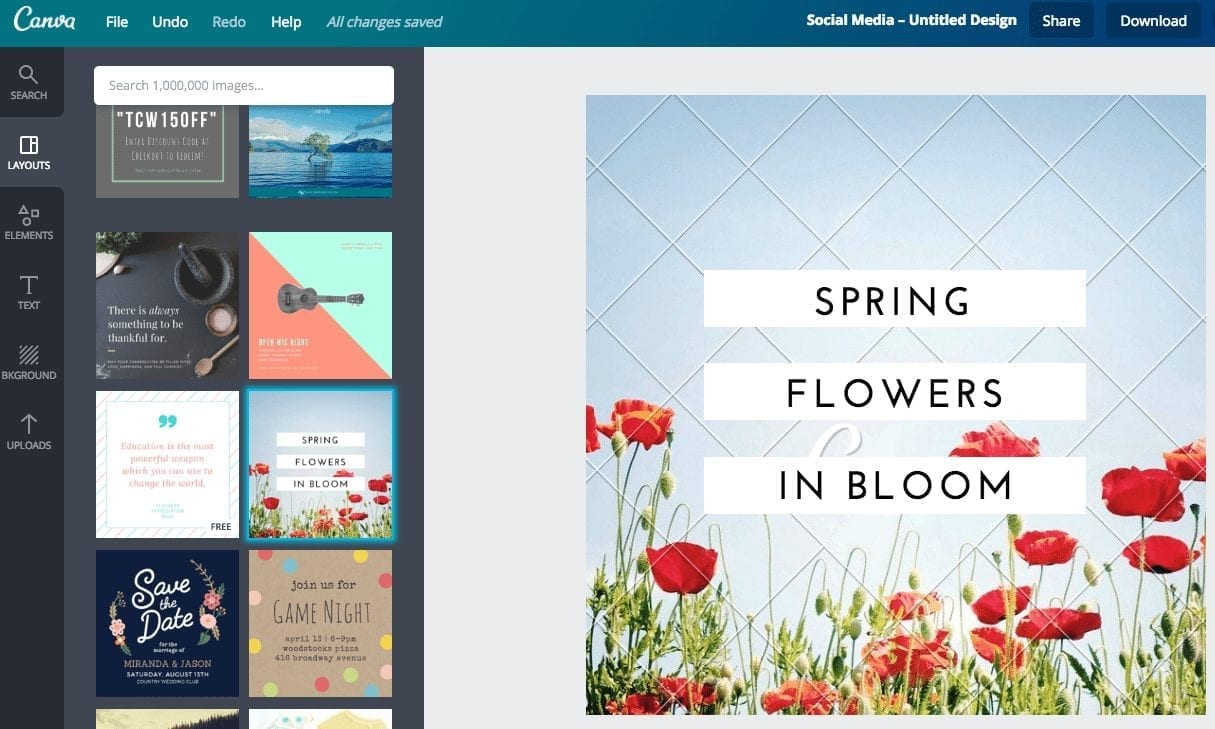
Step 2 – Choose a layout
Each template has a variety of pre-created layouts that you can change to suit your needs. For example, for a recent blog post, I used this pre-created layout and changed the words to suit my needs:
Canva makes it very easy for you to create images that combine text and shapes to draw readers in.
You have the option of creating from scratch as well though.
You can choose one of the templates and then create your own layout, using the pre-created ones for inspiration or starting with a blank canvas.
Step 3 – Choose your text
You can change any of the elements on any of the pre-created templates or add your own to your blank canvas, it's entirely up to you. Below is a quick screencast of how this actually works in practice:
[video_player type=”youtube” width=”700″ height=”350″ align=”center” margin_top=”0″ margin_bottom=”20″]aHR0cDovL3lvdXR1LmJlL2dNb0NfMlZnTVI0[/video_player]
Step 4 – Save and export
Once you've finished with your masterpiece, it's time to save and export. Canva gives you two options, to export as an image or as a PDF. I always export as an image, the file size is smaller and it's much easier to upload to my server.
You could use the PDF option if you had created an infographic (yes you can use Canva to create your own infographics too!) or if you were planning to upload to a printer — the PDF option allows you to save with bleed lines too.
I use Canva to create all my checklists, cheat sheets and other freebies for giving away here on the blog too.
 Step 5 – Add to your blog post

Now you can add your image to your blog post and publish.
But don't stop there, go back and create an image for Pinterest, Twitter and Facebook and share on each network, with a link back to your blog post as well.
It's all about leveraging the tools at your disposal!
I know that there are a number of other options out there when it comes to image creation tools, but Canva provides you with templates and sizes that are pre-disposed to the top social media channels, which makes creating images much easier. You can also create your Facebook cover here, the cover for a presentation, a poster and just released recently, Kindle book covers.
[Tweet “It's all about leveraging the tools at your disposal!”]
I'm sure you'll find it easy to see why I'm in love with this awesome social image creating tool!
Are you using Canva or do you think you've got a better tool that is similar in access and cost? Share it in the comments below and see if you can make me change my mind about Canva!
1 Response to "How to Use Canva to Create Awesome Social Images"
[…] is where I LOVE Canva. You can create all your social media headers and blog images from within […]